

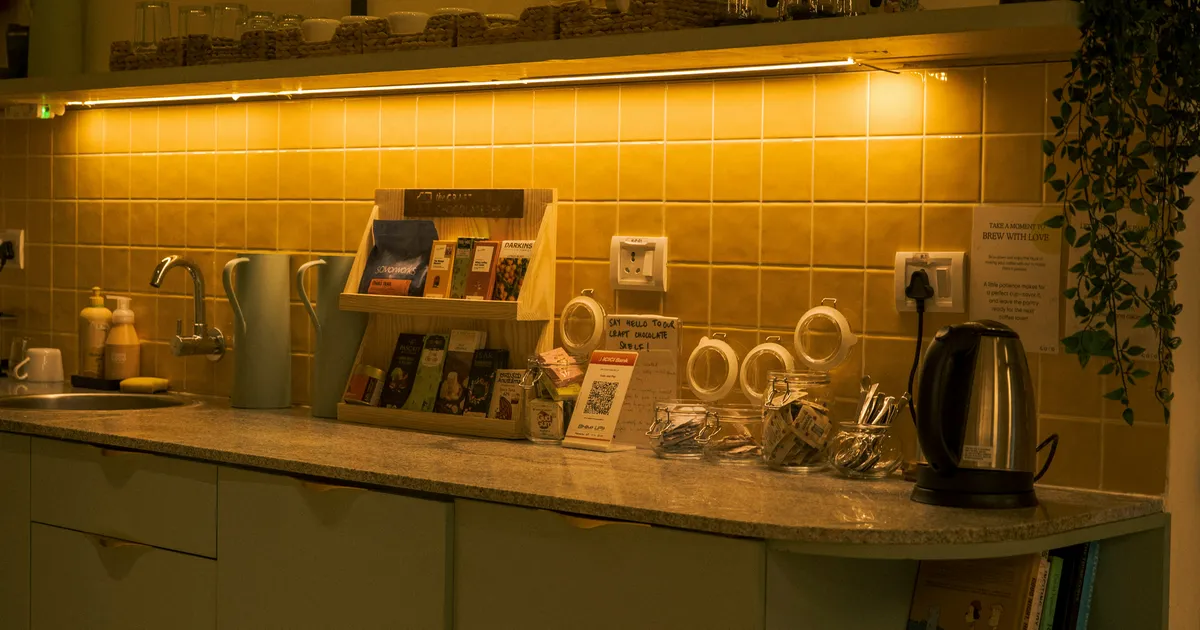

Installing under-cabinet LED strip lighting for energy-efficient task lighting is one of the most effective ways to upgrade a kitchen’s functionality while simultaneously reducing electricity consumption. By providing targeted illumination exactly where it is needed most, these fixtures eliminate the shadows cast by overhead lights, making food preparation safer and more precise. As we look toward 2026, the integration of smart-home compatible drivers and high-efficacy diodes has made this upgrade more accessible for homeowners than ever before. Proper installation is not merely about aesthetics; it involves strategic planning regarding voltage drop, heat dissipation, and color rendering to ensure the system lasts for years. By following industry-standard best practices, you can achieve a professional-grade lighting environment that maximizes energy savings and elevates the overall workspace experience.
Selecting the Ideal LED Components
The foundation of a high-performance lighting system lies in the quality of the components you choose. When selecting strips, prioritize high Color Rendering Index (CRI) ratings, ideally above 90, to ensure that food colors appear vibrant and natural under the lights. In 2026, the market has shifted toward COB (Chip on Board) LED strips, which provide a seamless, dot-free line of light that eliminates the need for bulky diffusers. Before purchasing, verify the wattage per foot to calculate your total power load accurately, as overloading a power supply is a common point of failure. It is also essential to select the correct color temperature; 3000K offers a warm, inviting glow, while 4000K provides a crisp, neutral task light suitable for modern kitchens.
Voltage selection is another critical design choice that dictates the longevity of your installation. While 12V systems are common, opting for 24V LED strips is highly recommended for longer runs, as they suffer less from voltage drop—a phenomenon where the light intensity fades toward the end of the strip. Always pair your strips with a magnetic or electronic dimmable driver that is compatible with your wall-mounted switches. Researching the latest standards from the Illuminating Engineering Society can provide deeper insights into light distribution patterns. By investing in high-quality, UL-listed components, you ensure that your task lighting system remains safe, flicker-free, and remarkably energy-efficient for the duration of its lifespan.
Strategic Planning and Layout
Before making any permanent modifications, map out your cabinet layout to determine the optimal placement of the strips. For maximum task efficacy, mount the LED channels toward the front edge of the cabinet floor, just behind the face frame or lip. This positioning ensures that the light is directed onto the countertop workspace rather than reflecting off the backsplash, which can cause unwanted glare. If your cabinets have deep recesses, consider using angled mounting channels to direct the beam precisely where your hands perform tasks. Taking the time to measure your runs allows you to group sections logically, which simplifies the wiring process and prevents excessive cable clutter under the cabinetry.
Consider the electrical infrastructure required to power your setup before you begin the physical installation. Ideally, you should aim to hide the power supply inside a cabinet, a pantry, or even an adjacent utility closet to maintain a clean, minimalist aesthetic. If you are retrofitting an existing kitchen, look for areas where you can fish wires through the wall or conceal them along the underside of the cabinets using slim, adhesive-backed cable raceways. Remember to account for the total length of the run, as exceeding the manufacturer’s maximum recommended length for a single power feed will result in uneven brightness. Proper planning in this phase saves hours of troubleshooting and ensures a seamless, professional installation that functions perfectly from day one.
Surface Preparation and Mounting
The longevity of adhesive-backed LED strips is entirely dependent on the cleanliness of the surface upon which they are mounted. Kitchen cabinets are often coated in a thin layer of grease or dust, which acts as a barrier that prevents industrial-grade adhesives from bonding correctly. Before peeling the backing, use a high-quality degreaser or isopropyl alcohol to thoroughly clean the underside of every cabinet surface. Allow the material to dry completely before attempting to apply the lights. If you are mounting strips directly to raw wood, consider applying a thin layer of primer or using aluminum mounting channels to provide a smoother, more reliable surface for the adhesive to grip.
For a truly professional finish, use aluminum LED profiles instead of sticking the strips directly to the wood. These channels serve three vital functions: they act as a heat sink to dissipate thermal energy, which significantly extends the life of the diodes; they provide a rigid, straight track for the strips; and the included plastic covers act as diffusers to soften the light. When cutting these channels, use a fine-tooth hacksaw or a miter saw with a non-ferrous blade for perfectly clean edges. Once the channels are screwed into the cabinet, the LED strips can be pressed into place with confidence. This method guarantees that your under-cabinet LED strip lighting remains secure, level, and aesthetically pleasing for years to come.
Wiring and Electrical Connections
Connecting your LED strips requires a basic understanding of low-voltage electrical principles to avoid common pitfalls like polarity reversal. LED strips are polarized, meaning the positive and negative terminals must be connected correctly to the power supply; failing to do so will result in the lights simply not turning on. When joining sections of strips, avoid traditional soldering if you are a beginner, as high-quality, snap-together “solderless” connectors have improved significantly in quality. However, for a permanent, vibration-proof connection, soldering remains the gold standard. Always ensure that your wire gauge is sufficient for the current load, referring to standard National Electrical Code guidelines for low-voltage systems.
Managing Voltage Drop and Cable Runs
Voltage drop is the hidden enemy of long LED runs, causing the lights to appear dimmer or shift in color temperature as they get further from the power source. To mitigate this, use thicker gauge wire for the runs between the power supply and the start of your strips, especially if the distance exceeds ten feet. If you are installing a very long run, consider injecting power at both ends of the strip, a technique known as “parallel powering,” which ensures consistent brightness across the entire length. Always double-check every connection point with a multimeter to ensure that you are receiving the correct voltage at the final diode in the chain, preventing long-term strain on the components.
Energy Efficiency and Smart Control
Under-cabinet lighting is inherently energy-efficient, but you can maximize these gains by incorporating modern control strategies. Installing motion sensors or door-activated switches ensures that the lights are only powered when you are actively working in the kitchen, preventing energy waste from lights left on by accident. In 2026, smart dimmers allow you to program scenes, such as a “night mode” that keeps the lights at 10% brightness for late-night access to water. Furthermore, choosing high-efficacy LED diodes—those that produce more lumens per watt—allows you to achieve the same brightness levels while drawing even less power from your electrical grid, which lowers your long-term utility costs significantly.
When selecting a power supply, look for high-efficiency drivers with a Power Factor (PF) greater than 0.9. These devices convert AC house power to DC strip power with minimal thermal loss, further improving the overall efficiency of your lighting system. You can compare the efficiency of different lighting solutions by looking at the table below, which highlights why LED strips are the superior choice for task-oriented kitchen lighting applications.
| Lighting Type | Energy Usage | Lifespan (Hours) | Heat Output |
|---|---|---|---|
| Incandescent | High | 1,000 | Very High |
| Fluorescent | Moderate | 10,000 | Moderate |
| LED Strip (2026) | Low | 50,000+ | Low |
Testing and Maintenance
Once the installation is complete, perform a thorough system test before finalizing the cable management. Turn the lights on and leave them running for at least two hours to check for any overheating or flickering issues. If you notice a flickering effect, it is usually a sign of an incompatible dimmer switch or a loose wire connection at the terminal block. Ensure that all wires are tucked away securely using adhesive clips or plastic raceways to prevent snagging during routine kitchen cleaning. A well-installed system should require virtually zero maintenance, but it is wise to periodically check the connections every few years to ensure that vibrations from cabinet doors have not loosened any screw terminals.
Keep a small supply of spare LED strip sections and connectors in a safe place. Should a small section of the strip fail due to a manufacturing defect, having matching components on hand allows for a quick, seamless repair rather than needing to replace the entire system. Because LED technology is evolving, buying an extra five-foot roll of the same strip model at the time of your initial purchase is an excellent insurance policy. By keeping your installation clean and your connections tight, you ensure that your energy-efficient task lighting remains a functional asset to your home, providing reliable, high-quality illumination for your culinary endeavors throughout the coming years.
Key Takeaways
- Prioritize high CRI (90+) LEDs for accurate color representation during food prep.
- Use 24V systems to minimize voltage drop and ensure consistent brightness.
- Thoroughly clean surfaces with degreaser before applying adhesive for a lasting bond.
- Incorporate aluminum channels for heat dissipation and improved light diffusion.
- Utilize smart sensors or dimmers to maximize energy efficiency and system longevity.
- Test all electrical connections with a multimeter before sealing the installation.
Frequently Asked Questions
Can I cut LED strips to size?
Yes, most LED strips feature clearly marked “cut lines” indicated by a scissor icon or copper pads. Always cut exactly on these lines to ensure the remaining segments can be reconnected or powered properly.
Do I need a professional electrician?
If you are simply plugging a driver into an existing outlet, it is generally safe for DIYers. However, if you are hardwiring a driver into your home’s main electrical circuit, consult a professional to ensure code compliance.
Why are my LED strips getting warm?
LEDs should remain cool to the touch. If they are excessively hot, it is likely due to lack of heat dissipation; mounting them in an aluminum profile will significantly reduce the temperature.
How do I hide the wires under the cabinets?
Use slim, adhesive-backed plastic raceways that match the color of your cabinetry to conceal wires running between segments, or drill small holes to route wires through the cabinet face frames.
Can I mix different brands of strips?
It is best to stick to one brand and model for a single circuit. Different brands may have slight variations in color temperature or voltage requirements, which can cause uneven lighting across your kitchen.
Conclusion
Installing under-cabinet LED strip lighting is a rewarding project that combines technical precision with practical utility. By carefully selecting high-quality components, preparing your surfaces with care, and utilizing smart control systems, you create a sophisticated task-lighting environment that is both energy-efficient and visually stunning. As we move through 2026, the ease of modern installation methods makes this an achievable goal for any homeowner. Follow these professional guidelines to ensure a robust, long-lasting system that eliminates shadows and enhances your daily kitchen experience, providing the perfect balance of form and function for your home.