


Learning how to replace a light switch safely at home is a foundational skill that every homeowner in 2026 should master to maintain their property’s electrical integrity. While modern smart home integration has made our living spaces more convenient, the humble wall switch remains the physical gateway to our lighting infrastructure. Many DIY enthusiasts mistakenly believe that swapping out a flickering toggle for a sleek, modern rocker switch is a trivial task, yet electrical work carries inherent risks that demand a methodical, evidence-based approach. By understanding the flow of current and the specific anatomy of your residential wiring, you can avoid the costly service fees of a professional electrician while ensuring your home remains compliant with the latest 2026 National Electrical Code updates. This guide peels back the insulation to reveal exactly what happens behind your walls.
The Anatomy of Residential Wiring
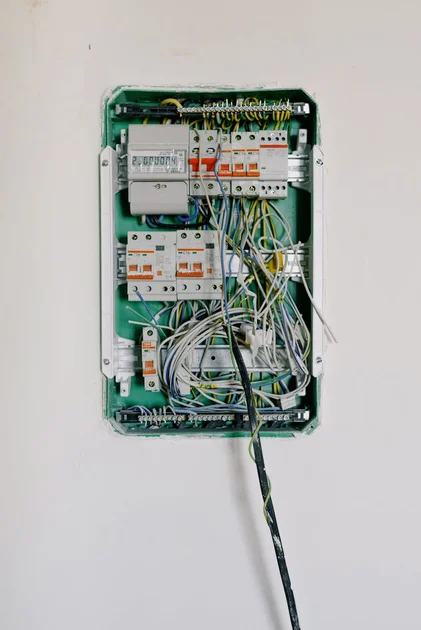
To understand the danger, one must first respect the complexity of the circuit. In most homes constructed or renovated by 2026, you will encounter the standard hot, neutral, and ground wire configuration. The hot wire, typically black or red, carries the current from the source, while the white wire serves as the neutral return path. The bare copper or green wire provides a critical safety pathway for faults, grounding the device to prevent chassis electrification. Never assume that color codes are universal; older homes may have inconsistent wiring, making a non-contact voltage tester an essential, non-negotiable tool for any investigative homeowner.
Beyond the wires, the switch itself functions as a mechanical bridge that interrupts the flow of electricity. When you flip the toggle, you are physically breaking the circuit path to the light fixture. If this mechanism degrades, arcing can occur, creating localized heat that might damage the surrounding insulation or, in rare cases, spark a wall cavity fire. By performing a routine inspection during your switch replacement, you are not just upgrading aesthetics; you are actively auditing the health of your home’s hidden infrastructure, ensuring that connections remain tight and free from oxidation or heat-related fatigue.
Tools and Safety Protocols
Safety in 2026 is no longer just about wearing rubber-soled shoes; it is about utilizing precision diagnostic equipment. Before touching a single screw, you must confirm that the power is completely severed at the breaker panel. Do not rely on the position of the switch itself, as faulty wiring can sometimes result in a switch that cuts off the load but leaves the line side energized. Always verify your work with a calibrated digital multimeter or a reliable non-contact voltage detector from a reputable manufacturer like Fluke, which remains the gold standard for electrical testing standards in industrial and residential settings.
Once you have confirmed the absence of voltage, ensure that your workspace is clear of conductive debris. Use insulated screwdrivers that are rated for at least 1,000 volts to provide an extra layer of protection against accidental contact. If you are working in a cramped junction box, consider using Wago-style lever connectors, which have become the industry favorite for 2026 due to their superior vibration resistance and ease of use compared to traditional wire nuts. These components minimize the risk of loose connections, which are the primary culprits behind electrical fires in domestic settings.
Comparison Table / Specifications Table
| Feature | Standard Toggle | Decorator Rocker | Smart Wi-Fi Switch |
|---|---|---|---|
| Installation Difficulty | Low | Low | Medium |
| Durability | High | High | Moderate |
| Aesthetic Value | Minimalist | Modern | High-Tech |
| Cost Efficiency | Budget-Friendly | Mid-Range | Premium |
| Connectivity | None | None | Cloud/Local API |
| Maintenance Needs | Near-Zero | Near-Zero | Firmware Updates |
Pros and Cons Analysis
The decision to replace a light switch involves weighing functional upgrades against the risks of physical installation. One major benefit is the ability to standardize your home’s interface, creating a cohesive design language across every room. Upgrading to decorator-style switches also offers improved tactile feedback and a cleaner profile that is easier to clean. Furthermore, moving to smart switches allows for granular energy monitoring, which can significantly reduce your monthly utility expenses in the long term. These benefits are substantial, provided the installation is performed with professional-grade caution and adherence to local building codes.
Conversely, the primary drawback is the potential for improper installation, which can lead to intermittent power issues or fire hazards if wires are not seated correctly. There is also the matter of electrical code compliance; some jurisdictions require a permit or a licensed professional for any modifications to the electrical system. If you are uncomfortable navigating the intricacies of a circuit box, the cost of an emergency call-out far outweighs any savings from a DIY attempt. Additionally, complex smart switches may require a neutral wire, which may not be present in older homes, leading to unforeseen compatibility hurdles during the project.
Advanced Circuit Considerations
In homes built before the mid-1990s, the absence of a neutral wire in the switch box can be a significant roadblock for smart home integration. If you find only two wires—the line and the load—you may need to look for “no-neutral” smart switches that operate by drawing a tiny amount of current through the bulb itself. Always check the manufacturer’s specifications to ensure compatibility with your existing LED lighting, as some smart switches require a minimum load to function correctly. You can research further details on wiring configurations through the National Fire Protection Association to ensure your setup meets current safety requirements.
Step-by-Step Replacement Workflow
Begin by locating the specific circuit breaker that controls the light switch and flipping it to the off position. Use your voltage tester to verify the power is dead, testing both the switch terminals and the wires inside the box. Once confirmed, unscrew the cover plate and pull the switch assembly gently from the junction box, taking care not to strain the existing wiring. Document the current configuration with a photograph, as this will serve as your primary reference when installing the new device. If you find multiple wires connected to a single terminal, do not disconnect them until you have labeled each one clearly with masking tape.
Next, detach the wires from the old switch. Inspect the copper ends for signs of scorching or pitting; if the wire appears brittle or blackened, trim it back to fresh metal before proceeding. Attach the wires to the new switch, ensuring that the ground wire is securely fastened to the green or bare metal screw. The line and load wires are usually interchangeable on standard single-pole switches, but if you are installing a three-way switch, identifying the common terminal is critical. Once the wires are secured, tuck them neatly into the box and mount the switch, ensuring it is level before attaching the faceplate.
Frequently Asked Questions
How do I know if my switch needs replacing?
If you notice flickering, a burning smell, or if the switch feels loose or warm to the touch, these are clear indicators that the internal contacts have failed.
Can I replace a switch without a neutral wire?
Yes, standard mechanical switches do not require a neutral wire, but smart switches often do; always check the device manual for specific requirements.
What is the difference between single-pole and three-way?
A single-pole switch controls one light from one location, while a three-way switch allows you to control the same light from two different locations.
Is it safe to use push-in connectors?
While convenient, many electricians prefer screw terminals, as push-in connectors can loosen over time, potentially leading to arcing and connection failure.
How much does a professional installation cost?
Depending on your location, a simple switch replacement by a licensed professional typically ranges from 100 to 200 dollars, depending on the complexity.
Conclusion
Mastering how to replace a light switch safely at home is an empowering endeavor that bridges the gap between basic maintenance and advanced home ownership. By respecting the electrical currents that power our lives and adhering to the safety protocols established in 2026, you can ensure that your upgrades are both aesthetic and secure. Remember that patience is your best asset; if at any point you feel unsure about the wiring configuration, there is no shame in pausing to consult a professional. With the right tools and a methodical mindset, you will keep your home illuminated, safe, and fully modernized for years to come.