

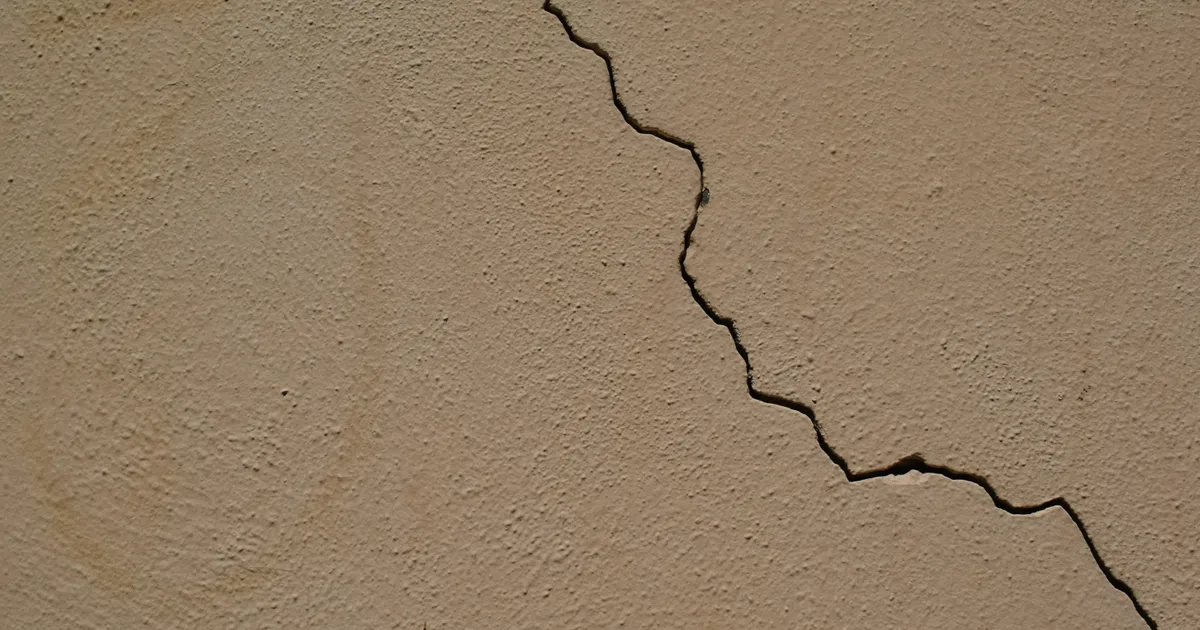

Are unsightly wall cracks diminishing your home’s appeal, but the thought of a full repainting project feels overwhelming? You’re not alone. Many homeowners search for effective methods on how to repair wall cracks permanently without repainting, aiming for a seamless finish that blends effortlessly with existing wall colors. The good news is that achieving a durable, invisible repair is entirely possible with the right techniques and materials. This guide will walk you through the process, empowering you to tackle those imperfections confidently and restore your walls to their pristine condition, all while saving you time, money, and the hassle of a major redecoration. Let’s dive into making those cracks disappear for good.
Understanding Different Types of Wall Cracks
Before diving into any repair, it’s crucial to understand the nature of the wall cracks you’re facing. Hairline cracks, often no wider than a piece of paper, are typically superficial and result from paint aging, minor house settling, or fluctuating humidity levels. They’re usually cosmetic and the easiest to address. On the other hand, larger cracks, especially those appearing in a stair-step pattern or near door and window frames, might indicate more significant structural movement. Identifying the type of crack helps you choose the correct repair strategy and materials, ensuring a permanent fix rather than a temporary cover-up that will reappear.
Ignoring the underlying cause of a crack can lead to its recurrence, negating all your repair efforts. For instance, a crack caused by excessive moisture might re-emerge if the humidity issue isn’t resolved. Take a moment to observe the crack: Is it stable, or does it seem to be growing? Does it appear seasonally? Understanding these nuances is the first step towards a lasting solution. For deeper insights into crack types and their causes, reputable sources like This Old House offer comprehensive guides that can further inform your diagnostic process.
Gathering Your Essential Repair Tools
A successful, permanent repair hinges on having the right tools and materials at hand. You’ll need a good quality utility knife or a five-in-one painter’s tool for scraping, a sturdy putty knife (4-6 inches wide is ideal), and a small trowel for applying compound. For materials, invest in a lightweight joint compound or spackling paste, fiberglass mesh tape (especially for wider cracks), and fine-grit sanding sponges or sandpaper (150-220 grit). Don’t forget a damp sponge for cleaning and feathering edges, and a dust mask for safety during sanding. Using professional-grade products, even for DIY, significantly improves the longevity and appearance of your repair.
When selecting your joint compound, consider a “setting-type” compound for deeper or more active cracks. Unlike drying-type compounds, setting compounds chemically harden, offering superior strength and minimal shrinkage, which is crucial for a permanent fix without repainting. For hairline cracks, a high-quality spackling paste might suffice, as it dries quickly and sands smoothly. Ensure all your tools are clean before starting, as dried compound or debris can compromise the smoothness of your finish. Preparing your workspace with drop cloths is also a wise move to keep your area tidy.
The Step-by-Step Invisible Repair Process
Begin by cleaning the crack thoroughly. Use your utility knife or painter’s tool to gently scrape away any loose paint or plaster along the crack. A damp sponge can help remove dust and grime, ensuring excellent adhesion for your repair materials. For hairline cracks, simply cleaning might be enough. For wider cracks, you might need to slightly widen the crack into a V-shape to allow the repair material to penetrate deeper and form a stronger bond, which is key to how to repair wall cracks permanently without repainting.
Once clean and dry, apply fiberglass mesh tape over any cracks wider than a pencil line. This tape provides crucial reinforcement, preventing the crack from reappearing. Next, apply a thin, even layer of joint compound over the tape and the crack, using your putty knife. Feather the edges outwards, blending the compound smoothly into the surrounding wall. Allow this first coat to dry completely, typically several hours or overnight. Drying times can vary based on humidity and compound thickness, so patience is essential for a flawless, paint-free finish.
Achieving a Seamless Finish
After the first coat is dry, lightly sand the area with a fine-grit sanding sponge until it’s smooth to the touch. Wipe away all dust with a damp cloth. Apply a second, even thinner coat of joint compound, feathering the edges even wider than the first. This step is critical for achieving an invisible repair that doesn’t require repainting, as it eliminates any visible ridges or depressions. Many experts emphasize thin, multiple coats over one thick application for the best results.
Let the second coat dry completely, then sand again with very fine-grit sandpaper (220 grit) until the repaired area is perfectly flush with the wall. The goal is to make the repair imperceptible to both sight and touch. Carefully inspect the area from different angles in varying light conditions. If necessary, apply a third, ultra-thin skim coat and re-sand. The final result should be a smooth, uniform surface that blends seamlessly with your existing wall texture and color, making the crack a distant memory by 2026.
Advanced Techniques for Tricky Cracks
Some cracks present unique challenges, such as those in corners or those that are particularly deep. For interior corners, a specialized corner tool can help you achieve sharp, clean lines when applying compound. For very deep cracks, it’s often best to fill them in stages, allowing each layer of compound to dry and shrink slightly before applying the next. This prevents excessive shrinkage in one go, which can lead to new depressions or even re-cracking.
If you suspect a crack is structural, meaning it affects the foundational integrity of your home, it’s always best to consult a professional. While cosmetic repairs can be DIY, structural issues require expert assessment to prevent further damage. Companies specializing in foundation repair can offer insights and solutions that go beyond surface-level fixes. Addressing the root cause of significant cracks is paramount for a truly permanent solution, ensuring your walls remain flawless for years, even beyond 2026.
Maintaining Your Walls Post-Repair
Once you’ve successfully repaired your wall cracks, ongoing maintenance is key to their long-term integrity. Regularly inspect your walls for any new signs of cracking, especially during seasonal changes when humidity and temperature fluctuations are common. Maintaining consistent indoor humidity levels, ideally between 30-50%, can significantly reduce stress on your walls and prevent new cracks from forming. A simple hygrometer can help you monitor this.
Promptly addressing any minor issues, such as small dings or scratches, can also prevent them from escalating into larger problems that compromise your crack repair. With these practices, your walls will remain pristine, showcasing your meticulous repair work. The satisfaction of knowing you’ve mastered how to repair wall cracks permanently without repainting, preserving your home’s aesthetic and value, is truly rewarding. This proactive approach ensures your home looks its best for many years to come, making it a comfortable and inviting space.
Key Takeaways
- Diagnose crack types correctly: Superficial vs. structural determines repair method.
- Use quality materials: Setting-type joint compound and mesh tape ensure durability.
- Apply thin, multiple coats: Crucial for a smooth, invisible finish without repainting.
- Feather edges meticulously: Blend the repair seamlessly into the existing wall texture.
Frequently Asked Questions
Can I use caulk to repair wall cracks?
While caulk might seem like a quick fix, it’s generally not recommended for most wall cracks that you want to repair permanently without repainting. Caulk is flexible and designed for joints that expand and contract, but it often shrinks, cracks, and doesn’t provide a smooth, paintable (or non-paintable) finish that blends with a flat wall surface. For a truly seamless repair, spackling paste or joint compound is the superior choice.
How long does a permanent wall crack repair last?
A properly executed permanent wall crack repair, especially one that addresses the underlying cause and uses quality materials like fiberglass mesh tape and setting-type joint compound, can last for many years, often for the lifetime of the wall itself. If the crack was due to minor house settling or cosmetic issues, and the repair was done meticulously, you shouldn’t see it reappear, even by 2026.
What if my repaired wall crack reappears?
If a repaired wall crack reappears, it typically indicates that the underlying cause was not fully resolved, or the initial repair method was insufficient for the crack’s nature. This might suggest ongoing structural movement, significant humidity fluctuations, or an active foundation issue. In such cases, it’s wise to consult a structural engineer or a professional contractor to investigate the root cause more thoroughly.
Do I need to prime the repaired area if I’m not repainting?
No, if your goal is to repair wall cracks permanently without repainting, you will not need to prime the repaired area. The entire process focuses on achieving a finish that blends perfectly with the existing wall texture and color, making the repair invisible. Priming is a step taken before painting to ensure paint adhesion and color uniformity, which is not applicable when skipping the repainting stage.
Conclusion
Mastering how to repair wall cracks permanently without repainting is an invaluable skill for any homeowner. By understanding the types of cracks, using the right tools, and meticulously following the steps for cleaning, filling, and feathering, you can achieve professional-grade results that restore your walls to their original beauty. This approach not only saves you significant time and cost associated with a full repaint but also empowers you with the knowledge to maintain a pristine home environment. Take the first step towards flawless walls today and enjoy the lasting satisfaction of a job well done.